Aug 182011
 

Assistant Brewmaster Bella

My trusty assistant

It was a brewing emergency – we had a scant two weeks before some beer-loving guests arrived to spend the weekend at the compound, and our kegs were running critically low! I checked the weather forecast and saw a week of rain – except for Wednesday. Wednesday was forecast to have cloudless skies and plenty of sunshine, an outlier in an otherwise crappy week. I quickly arranged to take the day off of work, grabbed the Assistant Brewmaster Bella, and set out to brew up some witbier.

I’m a big fan of witbiers – they are nice and refreshing on a hot day and are also great bridge beers you can use to expose your macroswill-chugging friends to craft beer without scaring them off. There’s a delicate balance that makes this a challenging brew to pull off correctly. The beer is supposed to have a touch of sweetness (usually present as honey or vanilla notes), moderate citrus fruitiness, some spicy, peppery notes, and a very slight lactic bite in the finish. If any one of these flavors becomes too dominant, the beer will lose the refreshing crispness that wits are known for. Witbiers should also have a somewhat creamy, smooth mouthfeel from the use of wheat and oats in the mash.

Mashing in the kettle

Mashing in the kettle


The recipe I used called for:

  • 5.5# of Pils malt
  • 5# flaked wheat
  • 2# flaked oats
  • 0.25# Munich malt
  • 1.2oz Hallertau hops @ 60 min
  • 43g citrus zest
  • 11g cracked coriander seeds
  • 1g dried chamomile flowers

You don’t need to grind flaked wheat and oats, but I threw them in the mill because I’ve heard of slight increases in efficiency when doing so. I mashed in my kettle, since this was a step mash and it’s much easier to do those with direct heat. I used a protein rest at around 124°F for 20 min or so and then brought the temp up to 158°F. The problem with mashing in my kettle is that it loses heat very quickly. I had to fire the burner several times over the mash to keep the temp up, and in reality it fluctuated anywhere between 160°F and 153°F. It spent the bulk of the time in the 156-159°F range, so hopefully there will be no ill effects on the finished product.

I tried a new technique this time – iodine testing for starch conversion. Basically, you buy a bottle of tincture of iodine (available at any pharmacy) and use it to test your mash. Extract a small sample of mash liquid (there should be no grain particles in the sample) in a bowl or something and add a drop of iodine – if it turns black, conversion is not complete. If it stays tan/reddish, you are good to go. My recipe called for a 90 minute mash due to all of the wheat and oats, but testing at 60 minutes showed conversion was done so I mashed out at 168°F. I then added about a half pound of rice hulls to help avoid a stuck sparge.

Hops and zest

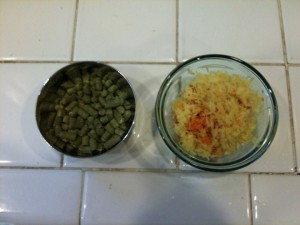
Hallertau hops and citrus zest

I nailed my pre-boil target exactly – 7G of wort @ 1.042 SG. The rest of the brew went very well, except for one mistake – I miscalculated my evaporation rate. I had been doing 60 minute boils and forgot to compensate for the fact that I was using a 90 minute boil for this recipe. Stupid mistake, and I paid the price. What should have been 5.5G of 1.050 SG wort turned out to be ~4.75G of 1.069 SG wort!!

Well…I made two mistakes here. First was not compensating properly for the longer boil. Second was not testing the gravity during the boil. If I had been keeping an eye on things, I could have added water or reduced the boil time to compensate. However, if I’m going to miss on gravity, I always prefer missing to the upside. When my beers miss high, I just throw the “imperial” tag on them and call it a day!

Highlight of the brewday had to be the last five minutes of the boil, when I added in the citrus zest, the chamomile, and the coriander – the wort smelled amazing! I didn’ have time to make a yeast starter for this brew, so I pitched two packs of Wyeast 3944 (Belgian Witbier). Not very cost effective, but the right thing to do in the absence of a proper starter.

All in all, it was a good day and a good brew – I just hope the higher alcohol content doesn’t wreck the balance of the beer. I’ll keep you posted!

Jun 212011
 

Alarm clockAfter several very busy weekends, I find myself a couple of kegs short of my July 4th weekend party goal. The party was supposed to feature four styles of beer, which I knew was an ambitious plan. I should be happy I have two styles ready to go – the American IPA I brewed in late May, and a batch of Kölsch brewed a couple of weekends ago which is ready to be kegged.

Most brewers would hang up their mash paddle and enjoy the party, happy to be able to serve 10 gallons of good brew instead of the usual backyard BBQ crappy macroswill. Especially considering that there is still a plethora of party details to take care of in the next week and a half, including a fairly involved food menu. However, I am not like most brewers – I am completely insane. I’m considering trying to go from grain to glass in one week.

Many a brewer has tried to rush a beer along to try and meet some competition or party deadline. Most of the time, the results are disastrous. The dance of yeast and malt is a fickle one, and trying to force the beer to bend to your schedule can lead to a host of issues. Hot fusel alcohol notes from high-temp turbo fermentations, CO2 bite from rushing a forced carbonation (natural carbonation isn’t even an option on this schedule!), and overall green-tasting beer are just a few of the perils that await an impatient brewer.

I do, however, think it can be done. Let’s talk about some assumptions.

Assumption 1: You aren’t doing this with any kind of complex beer. Forget anything with an OG above 1.040 or so. Forget your dry-hopping, your nine-malt grain bills, your oak chips, your bourbon infusions, all of that. We have to go fast here, and any kind of complexity is going to need time to mellow and allow flavors to meld.

Chris Hansen

"Put down that Hefe and have a seat over here"

Assumption 2: Forget any kind of aging/conditioning process. If we had time to lager this beer, we wouldn’t be in this situation. So we need ales that are best enjoyed young. I mean really young. I mean, if these beers were people, you’d have Chris Hansen getting all To Catch a Predator on your ass. A few styles instantly come to mind – witbiers, hefeweizens, English milds, American wheats – all best served at the peak of freshness.

Assumption 3: We need a fast and furious fermentation, but without sacrificing the beer quality by going too hot. Hefeweizen yeast can ferment at higher temps, but I still try and keep things on the cool side to keep the banana esters from becoming too overpowering. Saison is another style that can be fermented on the warm side, but I think it might have too complex a flavor profile to meet our first assumption. So, if we can’t ferment hot, how else can we speed up the process?

Assumption 3a: We are going to need a lot of yeast. This means either using a yeast cake or making a very large starter. You want the yeast to hit the ground running and not waste a single precious moment.

Assumption 3b: We want to use wheat, which is known for extremely active and fast fermentations. Wheat beers offer another advantage as well – they are usually meant to be served with yeast in suspension, meaning we don’t have to worry about filtering or wasting precious time trying to get the beer to drop clear.

OK – so now that we have some ground rules, it’s time to figure out exactly what to brew. This beer will be served next to an IPA and a Kölsch, so I want its flavor profile to be somewhere in the middle. I’m going to use the yeast cake from the Kölsch, so a true hefe is out. That leaves me with a witbier, with its coriander and citrus tang, or an American wheat, which I would probably add some sort of fruit extract to. I plan on fermentation being done by day three or four, leaving me some time to get the beer kegged and carbed in time for the party.

I’ll be making my final decision over the next couple of days, and plan to brew this puppy in a late-night session after work on Friday. I’ll keep you posted.

Jun 082011
 

Old beer cansI opened up the chest freezer I use as a serving fridge, not really knowing what to expect. It had been almost a year since I had poured any homebrew, and I figured the inside of the freezer would be a mess, full of nasty, empty kegs and some kind of mold/slime combination. I wasn’t looking forward to the cleaning job that surely awaited me.

Imagine my surprise when I discovered a nice, clean interior stocked with three almost-full kegs of beer, and a bottle of champagne to boot! The freezer had been held at a steady 40°F the entire time, and the kegs were all pressurized. Only one question remained – was the beer still drinkable??

It looked like I had about 7 or 8 gallons of a pumpkin spice I had brewed (which had turned out a bit more “imperial” than I had intended) and around 4 gallons of the Kölsch I brewed last August. I poured a few pints, called the wife over, and proceeded to hope for the best…

…and it was good!! All the beer was excellent! The carbonation levels could use some adjustment, but the pumpkin spice ale had mellowed nicely, and the Kölsch didn’t have any off-flavors to speak of! This was great news, since I worry so much about sanitation and the longevity of my beers. I’d love to brew up some special Belgians or barleywines and cellar them for a few years, and this gives me a boost of confidence that my procedures are pretty sound and I might be able to pull that off.

Now, I’m left with a problem I don’t mind having – how to dispose of many gallons of tasty homebrew to make room for many more gallons of tasty homebrew?

Sounds like a party to me!

Aug 162010
 

The flags of Köln and DeutschlandThe good news: I now have ten gallons of Kölsch fermenting in my chest freezer (which just BARELY fits two 6.5G plastic buckets inside).

The bad news: In brewing my first 10G batch, I completely botched my water measurements and had a generally sloppy brewday.

OK, so the good news outweighs the bad news – assuming the beer turns out well! I’m glad I was able to rumble through the day and finish with two fermentors full of beer, but I’m mad at myself for fudging my processes…I know, relax, don’t worry, have a homebrew, right?

I measured the water into my mashtun by weighing it, like I have for the last two brews, in an attempt to pinpoint losses and grain absorbtion rates in my system. My big mistake was not weighing the wort runoff – I figured I could estimate the volume based on how many times I filled the 1/2 gallon pitcher I use, but later found out that pitcher is not exactly accurate and holds a bit more than I thought. I can’t say why I chose not to weigh the runoff, but I think it was a mix of laziness and impatience. I’m kicking myself now.

Long story short, I wound up with 15.3G of wort (which I thought was 14.4G). I was quite confused when my 15G kettle wouldn’t hold all the runoff – I figured I had a smaller kettle than I thought I did. Looking back on my notes today and inspecting the pitcher, it became clear that estimating the runoff volume was a huge mistake.

Just to kick a brewer when he’s down, my pump decided to be a pain in the ass, and my pellet hops turned into a solid sludge at the bottom of the kettle, completely blocking my bazooka screen when I was pumping to the fermentors. I’ve never seen pellet hops clump up like that – it was a pretty solid mass! Not sure if that was a result of whirlpooling while chilling or the specific pellets I used (they were Hallertauer, for what it’s worth). I think I’m going to use a hop bag next time.

So, it was a rough session and all my numbers for this brew are a bit fuzzy, but I’m not going to stress about it. I didn’t miss my OG by much, and the beer should turn out just fine. I just wish I could finally reach the nirvana which is truly knowing my system and hitting my numbers every time. For the next session, I will weigh both water in and wort out of the mashtun, and I will make a dipstick to measure kettle volume before and after the boil. There are a lot of variables to pin down, but I hope being overly precise now will give me the data to churn out consistently great beer down the line. I need repeatability, and I will not allow myself to build or buy an automated brew system until I can get this right manually. It’s a frustrating endeavor, but I will get it one of these days…

…and hey, no matter what, I have TWO buckets of beer happily bubbling away!

May 042009
 

Well, thanks to our gracious hosts J-Dawg & Mike , my brewing drought is over and the first batch of 2009 is bubbling away! The group brew was a great time – eleven people turned out, four batches of beer were brought into the world, and numerous microbrews and homemade Buffalo wings were devoured by all.

A rainy day did not slow us down as J-Dawg & Mike’s spacious garage gave us the shelter we needed to get on with the festivities. I was brewing an Old Specklen Hen clone I picked up from Maltose Express. I got a bit of a late start because I was busy drinking beer and chatting, but once we got underway it was smooth sailing. It was a pleasure to take a break from the complexity of an all grain brew – I didn’t measure, didn’t take any gravity readings, just followed the directions in the kit (ha!) and concentrated on having a good time.

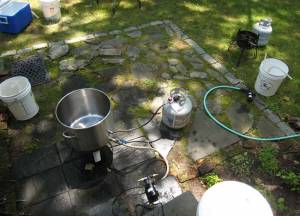
My Big Brew setup

My Big Brew setup

Continue reading »

Jan 052009
 

Welcome to 2009! It’s been almost a full month since I posted last, and in that time, I’ve been struggling with the Winter weather here in the Northeast. My last post on winter brewing had a few of you chime in, and it seems like many of you do head indoors and fire up the stove for some extract and partial boil brews. Man, I was really hoping for some off-the-wall Rube Goldberg-esque methods to defeat the cold and brew in complete comfort – go figure, most of you just go inside your houses. Once again, I am overthinking…

With this in mind, I headed out to the brew store last week and picked up my first brew kit in a long time. There was something relazing about not having to worry about measuring grain and hops – everything is all bagged and ready to go. The kit is a clone of Old Speckled Hen, which I chose for its fairly quick grain to glass timeframe. I am brewing this as a belated Christmas gift, and I’d like it to be ready before Spring arrives!

So, brewing is planned for Saturday – weather be damned! I have to scrounge up my old boil kettle and give it a good washing – I think it has been relegated to the basement and stuffed with old towels or something.

I think this will be cathartic – I had a very disappointing brew year in 2008, and now it’s a new year and I’m returning to my roots. Sometimes you have to break things down and get back to the essence to remember why you like to do them. I’m hoping this will be the spark that gets 2009 off to a great start!

Do you guys have anything brewing for the New Year? Drop a line and let me know. Also, if you do have any crazy and creative Winter brew tips, shoot them over – there’s still plenty of cold weather left to put them to the test!

Dec 092008
 

Snowflake

Winter brewing?

I wound up postponing my brew session planned for this past Sunday when I woke up to a frigid morning and a fresh blanket of snow on the ground. I could’ve dealt with the snow, and I might’ve been OK with the cold, but the real brew killer was the fact that my garden hose was frozen!

Back in my apartment dwelling days, I brewed all year round with no worries – one of the distinct advantages of doing partial boils and extract beers. I briefly considered converting the recipe to extract, but didn’t know if the long boil would mess up my stove (one of those electric flat cooktop ones). Frustrated, I put off the brew until this coming weekend, and all I can do is hope for some better weather.

So, how do you guys do it? I’ve read accounts of brewers in Minnesota brewing in sub-zero weather, so I should be able to handle the occasional freezing brewday. What do you guys do when the weather gets cold? Do you have a system to deal with the cold weather (mash indoors, use the cold to your advantage when chilling, etc…)? Do you brew indoors, switching to smaller batches or partial boils? Or do you hang up your mash paddle until the Spring? And how do you deal with a frozen water supply anyway???

I feel this year was such a bust – I totally missed out on the Fall, which is my favorite season to brew. I missed performing the Great Pumpkin Beer Challenge, and didn’t get my Winter Warmer brewed. What a waste of some good brewing weather. It would kill me if I couldn’t brew again until March. Not to mention I need to get this beer done in time for Christmas!

Email me or leave a comment with your best winter brewing tips – if I get enough, I’ll compile them into a separate post. Happy brewing!

Sep 082008
 

Denny Conn

Denny Conn

I am extremely happy to announce the second in the Private Tastings interview series: Denny Conn! Denny is an extremely well-respected homebrewer, well-known for both his award winning recipes and his enthusiastic promotion of the batch sparging technique. Both have had a dramatic impact on my own brewing, and I am honored to have Denny as a guest. Thanks, Denny!! Let’s get to the interview…

Private Tastings: What inspired you to begin homebrewing?

Denny Conn: I started cooking for a hobby after I first saw Julia Child when I was about 13 years old. Also, growing up in the 60s and 70s kind of gave me a “do it yourself” kind of attitude. Once I moved to the Pacific Northwest in the mid 70s I discovered some of the great new craft beers that were happening here. I really wanted to make them myself, but it wasn’t until my business partner started brewing and showed me how easy it was that I was really hooked. It was cooking to the max, combined with science, another major interest of mine…and you got to drink the results!

PT: One could say there are two extremes when it comes to brewers – artistic brewers who eschew exacting measurements and style classifications, and scientific brewers who aim for precision and consistency over creativity. Do you lean more to one side than the other, or would you fall in the “a little of both” category?

DC: I’m firmly in the “a little of both” camp. Precision and consistency are wonderful things, but it’s not necessary to think of them as mutually exclusive to artistry and creativity. For me, it’s the science and precision I’ve learned that give me the knowledge and confidence to pull off the crazy ass stuff, like Bourbon Vanilla Imperial Porter or Chanterelle Wee Heavy.

PT: If you could give only one piece of advice to a homebrewer who wants to make better beer, what would it be?

DC: Pay attention to what you do and how your beer reacts to it. And that starts by learning some fundamentals so that you know what to pay attention to. When I started brewing, I found what was about the only Internet resource at the time, the rec.crafts.brewing Usenet newsgroup. To this day, I still check in there every day. I learned to recognize the more experienced people and try out what they said they were doing, especially if some of what they said matched experiences I’d previously had. Sometimes their advice worked for me, and sometimes it didn’t. But this is the course I’d advise every new brewer to follow…gather all the information from various sources that you possibly can and filter it through your own experience. Identify people whose advice and experience you think you can trust, and try things to see what works for you. Before too long, your own experience will make you the expert.

PT: You are probably best known to the brew world for two things: your promotion of batch sparging, and your killer recipes. Starting with batch sparging – what was the reaction you got from fellow homebrewers when you first started promoting the technique?

-and-

PT: How did you come about using batch sparging in your own brewing? Was it a sudden epiphany, or a gradual evolution?

DC: I learned about batch sparging first from a mention in the HomeBrew Digest from George Fix. I’d already done a couple stovetop, hand-fly-sparged batches and found it total pain. Then, I ran across an article by Ken Schwartz that explained how to batch sparge and provided equations for calculating amounts of grain and water. Another article by Ken had plans for building a cooler mash tun using one of Jack Schmidling’s SureScreens (all of Ken’s articles are available at http://home.elp.rr.com/brewbeer/). I tried it and was amazed by how much easier it made things and the quality of the beer that came from it. I began talking about it on rec.crafts.brewing. There was a LOT of skepticism from brewers……I recall one person saying he’d told the owner of the LHBS about it and was told it would make “dirty beer”!

Fortunately, a few posters on rcb were already doing it so I had some support. One of them was Bob Regent, who had been around a while and was a respected brewer. He talked about how he had given up his fly sparging rig for batch sparging. He not only backed me up, I also learned a lot from him. And it never hurt to mention that George Fix thought highly of it! Eventually, people started trying it and getting the same kind of great results that I had. I think I started using the hose braid after someone on HBD had said something to the effect that “if the SureScreen worked, it seems like the braid off a toilet hose would work”. I tried it, and sure enough, it worked great. So the entire system was put together from a collection of various ideas that I tried to weave together into single system and technique. These days, I’d wager that there are as many homebrewers batch sparging as fly sparging.

Editor’s Note: We at lootcorp.com are firmly in the batch sparge camp, all thanks to Denny’s great tutorial page, Cheap ‘n’ Easy Batch Sparge Brewing. Check it out.

PT: Regarding recipes, how did you come up with such favorites as your RyePA, Nick Danger Porter, and Bourbon Vanilla Imperial Porter? These are all big, robust beers with complex taste profiles. Were they the result of random experimentation, or were they carefully planned out? How many batches did you have to go through before you got to the “final” versions?

DC: I’m more of a “plan it out and brew it” guy than a “throw some stuff in there and see what happens” guy. Sometimes that works in my favor, other times it might constrain me from trying something new. But for most recipes, I fall back on my cooking skills…I use my “taste imagination” to either “visualize” what the finished beer will taste like, or what the combo of ingredients I use will taste like. Then I brew the first iteration and evaluate how close it came to what I was shooting for. In the case of the Rye IPA recipe, it began with the idea to brew an IPA using Mt. Hood and Columbus hops. It was going to be a special beer for my wife’s annual birthday party since she likes super hoppy IPAs. I brewed several variations and ran each by her for comments. At one point, I thought about using some rye for part of the base malt, and brewed several more versions to get the right balance of rye and the specialty malts. Altogether, I’d say I brewed it maybe 10-12 times before we settled on the final version. The BVIP took about 4-5 test batches of the base porter before I got it to the point where it would play nice with the other flavors in there (BTW, a good friend uses the base porter recipe to make a delicious coffee porter). I’d say that Nick Danger took about 3-4 tries.

PT: I just brewed my first batch of RyePA with the Denny’s Favorite yeast – I’ll be reviewing my batch shortly after posting the interview!

DC: GREAT!!!

PT: Wyeast recently named one of their Private Collection strains after you – can you give a brief description of the strain and how it came to be called “Denny’s Favorite”?

DC: Early on in my brewing hobby, I decided I wanted to start ranching yeast and bought the equipment and a few plates of yeast from a company called Brewtek. I had no idea what most of the yeasts were like. One of them was “California Pub Ale Yeast CL-50”. I tried it in a batch of Rye IPA and found that it gave the beer exactly the kind of mouthfeel I loved…rich and silky, but very clean. I used the yeast, keeping it on slants, for many years, all the while extolling it to other homebrewers. One of the guys in our club tried it and liked it as much as I did. Fortunately, he’s a microbiologist in real life and took over keeping it in our club’s yeast bank, which he also manages. Brewtek closed down and the strain bounced between a couple other companies for a few years before the last one to have it closed down also. In the meantime, other brewers had begun using it and loving it, and many more wanted to but were unable to source it.

I spoke with Dave Logsdon about Wyeast carrying it at a homebrew comp in about 2005 and again later that year at NHC in Orlando. He was interested, but at that time another company had it so he declined. After the final company carrying it closed down, Wyeast contacted me to get a sample for their lab, so the WY2450 people buy from Wyeast came right out of the club yeast bank! Apparently, they got really great response from it and are considering releasing it again. If people are interested in seeing it come back, they should contact Wyeast and let ‘em know they want it!

Editor’s Note: It really is some great yeast – get on Wyeast’s case about re-releasing it, and when you see it on the shelves again, buy some!!

PT: Being a homebrew celebrity must come with some benefits – besides having yeast strains named after you, have you enjoyed any other cool perks?

DC: Wow, “homebrew celebrity”…that’s kinda a weird concept to grasp! I’ve been lucky in that since I love to talk about beer, my name has gotten around. Sometimes I get samples of new products, sometimes other homebrewers ship me their beer to try…but I’d have to say the biggest perk for me is when somebody says to me that they learned to brew AG beer by reading what I’ve written, or that they brewed on of my recipes and loved it. I got so much help from more experienced brewers when I started brewing, and it’s a real pleasure for me to pay that back by helping others when I can. For me, being part of the community of homebrewers is the biggest perk of all!

Well, there you have it. I think that was a great interview, and I’d like to say thanks again to Denny for spending the time on it. Look for the review of my batch of RyePA in the next day or two!

Jun 102008
 

Click here for this brew session’s recipe…

Sunday, the first of June, was a beautiful and sunny day in Fairfield County – perfect for brewing. I had been planning to make a batch of a Leinenkugle’s Sunset Wheat clone for some time, so I seized the opportunity and fired up the ol’ burners. Since this is the first brew session I am posting, I’ll go into more detail about my process than I would otherwise. If you have any questions, leave a comment and I’ll be happy to answer them!

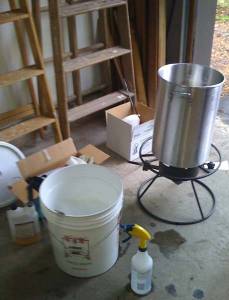
Brewday equipment

My brewday setup

Continue reading »

May 222008
 

As I’ve progressed as a homebrewer, I’ve spent a lot of time trying new techniques and tweaking my process. Here are the five changes I’ve made which have had the greatest impact on the quality of the beer I brew.

1. Controlling fermentation temperatures
This is the single most important thing I can recommend to new homebrewers, since it is often overlooked in the beginning and will make an enormous difference in every beer you brew. The first beer I made was fermented in an 80°F ambient room with a brewbelt on the fermentor. It was an awesome beer because I made it, but I don’t think I’d much enjoy a bottle of that today. Fermenting hot can cause all kinds of off flavors and nasty fusel alcohols in the finished product. Fermentation temperatures, with few exceptions, are best kept in the low to mid 60s for ales and even cooler for lagers. A cheap mini-fridge (I got mine on craigslist for $100) and a temperature controller turned my beers from OK to delicious.

2. Pitching the correct amount of yeast
This is another technique that can help all of your beers – extract, partial mash, or all grain. Controlling fermentation is paramount to brewing, and pitching the proper amount of healthy yeast is a big part of that. For every beer you brew, you should be going to Jamil Zainasheff’s Pitching Rate Calculator and figuring out the correct amount of starter, dry yeast, or slurry you should be pitching. If you are using liquid yeast, do yourself a favor and learn how to make a yeast starter (I will have a step-by-step tutorial with pictures posted here soon). Your beer will return the love.

3. Switching to full boils
When I started out, I was constrained to doing partial boils of extract recipes. The size of my brewpot, stove, and apartment dictated the maximum amount of wort I could safely boil at one time. This is a great way to get started in the hobby – you can start off on your household stove, you don’t need a huge kettle, and the boil and cooling phases of the brew are quicker and easier. However, I definitely saw a big difference in quality when I was able to move to full boils. Not only did it prepare me for the leap to all grain, but it produced a better beer – it is almost impossible to produce a light-colored beer with a partial boil due to the concentration of the wort, and full boils allow for proper hop utilization. Even if you never switch to all grain, make the switch to full boils if your circumstances allow.

4a. Switching to all grain
Ahh, the Holy Grail of brewing. Many homebrewers will never attempt all grain – for some it is more trouble than it’s worth, while others may not have the space, time, or money to make the switch. That’s fine – you can make excellent beers using extract, and the many varieties of extract available today gives you a lot of flexibility to brew different styles. However, if you want total, complete control of the brewing process from start to finish, all grain is a must. It’s really not that difficult once you get the hang of it, and, personally, I feel more invested in a beer that I created out of actual grain. My all grain beers taste much better than my first extract brews, but I wouldn’t blame the extract. Rather, switching to all grain forced me to really learn about beer and become a better brewer. All grain may not be for everyone, but I highly recommend it!

4b. Switching to mini-mashes
Even if you never make the switch from extract brewing, learn to do a mini-mash so you can take advantage of the many specialty grains available to you. My first all-extract beers were lacking in depth and flavor. As soon as I started making some mini-mash kits out there, I saw what a difference specialty grain made in the taste of my beer. Mini-mashes are easy and you get a lot of bang for your buck – just be warned, it’s a slippery slope down to all grain!

5. Kegging my beer
Kegging didn’t directly improve my beer, but it has been one of the biggest improvements to my brewery. Aside from the benefit of having cold, tasty homebrew on tap at a moment’s notice, kegging eliminates my least-favorite part of brewing: bottling. I’ve cut my bottling day time down to thirty minutes, and eliminating this tedious chore has led to increased brewery output and brewer happiness. Also, corny kegs make great vessels for lagering or conditioning, and being able to transfer beer under CO2 pressure helps reduce oxygenation concerns during racking.