Aug 162010
 

The flags of Köln and DeutschlandThe good news: I now have ten gallons of Kölsch fermenting in my chest freezer (which just BARELY fits two 6.5G plastic buckets inside).

The bad news: In brewing my first 10G batch, I completely botched my water measurements and had a generally sloppy brewday.

OK, so the good news outweighs the bad news – assuming the beer turns out well! I’m glad I was able to rumble through the day and finish with two fermentors full of beer, but I’m mad at myself for fudging my processes…I know, relax, don’t worry, have a homebrew, right?

I measured the water into my mashtun by weighing it, like I have for the last two brews, in an attempt to pinpoint losses and grain absorbtion rates in my system. My big mistake was not weighing the wort runoff – I figured I could estimate the volume based on how many times I filled the 1/2 gallon pitcher I use, but later found out that pitcher is not exactly accurate and holds a bit more than I thought. I can’t say why I chose not to weigh the runoff, but I think it was a mix of laziness and impatience. I’m kicking myself now.

Long story short, I wound up with 15.3G of wort (which I thought was 14.4G). I was quite confused when my 15G kettle wouldn’t hold all the runoff – I figured I had a smaller kettle than I thought I did. Looking back on my notes today and inspecting the pitcher, it became clear that estimating the runoff volume was a huge mistake.

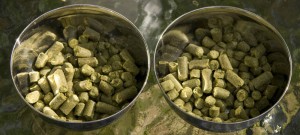
Just to kick a brewer when he’s down, my pump decided to be a pain in the ass, and my pellet hops turned into a solid sludge at the bottom of the kettle, completely blocking my bazooka screen when I was pumping to the fermentors. I’ve never seen pellet hops clump up like that – it was a pretty solid mass! Not sure if that was a result of whirlpooling while chilling or the specific pellets I used (they were Hallertauer, for what it’s worth). I think I’m going to use a hop bag next time.

So, it was a rough session and all my numbers for this brew are a bit fuzzy, but I’m not going to stress about it. I didn’t miss my OG by much, and the beer should turn out just fine. I just wish I could finally reach the nirvana which is truly knowing my system and hitting my numbers every time. For the next session, I will weigh both water in and wort out of the mashtun, and I will make a dipstick to measure kettle volume before and after the boil. There are a lot of variables to pin down, but I hope being overly precise now will give me the data to churn out consistently great beer down the line. I need repeatability, and I will not allow myself to build or buy an automated brew system until I can get this right manually. It’s a frustrating endeavor, but I will get it one of these days…

…and hey, no matter what, I have TWO buckets of beer happily bubbling away!
Jun 212010
 

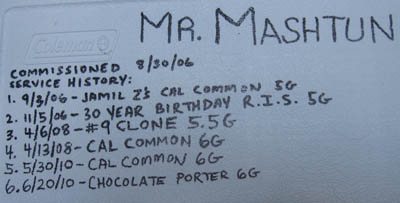
Mr. Mashtun

Mr. Mashtun

If you’ve been keeping up with the blog, you know I’ve been trying my hardest to pin down efficiency losses in my system. I started keeping meticulous records on water in and wort out numbers, going as far as weighing the liquid to be as accurate as possible. When my last brew session clocked in with an efficiency in the mid-50’s, I decided to try changing my mill.

Up until now, I’ve been milling my grain with a Corona (aka Victoria) mill. This is a cheap mill made for grinding corn into flour for tortillas, not necessarily for crushing malt for brewing. There are some die-hard Corona mill supporters out there, claiming they can regularly get in the 80% efficiency range, but I never felt it gave me a good crush. In my experience, it was horribly imprecise, either spitting out uncracked grain or pulverizing both husk and kernel into flour. Add to that the small hopper and manual hand-crank operation, and it was time for a change (yes, you can motorize the Corona fairly easily, but I didn’t think it was worth the effort). I’m not doubting that people get good results with the Corona, but for me, it was too little, too late.

I did a bit of research, and wound up ordering a Barley Crusher mill. This is a highly rated, fairly inexpensive grain mill with two knurled steel rollers designed especially for brewing. I took advantage of the discount pricing BeerSmith is offering and ordered the 15 pound hopper model for $154 (with shipping). When the mill arrived this week, I was excited to try it out for this weekend’s brew.

In a word: amazing. The Barley Crusher took a little adjusting to – I ran a half pound of grain through to break it in, per the instructions, with no issues. Using a power drill which easily attached to the crank, it took about three seconds. However, when I loaded the hopper with 10 pounds of pale malt, the rollers wouldn’t grab the grain and just spun uselessly. A quick search online showed this isn’t an uncommon problem, but one that is easily solved – by loading the hopper with one scoop of grain first, I was able to “prime” the rollers and once they caught, I was free to load the hopper to capacity.

What would have taken me the better part of an hour with the Corona took no more than three minutes with my DeWalt drill and the Barley Crusher. More importantly, however, was the look of the crush – the kernels were all cracked nicely, but the husks were still intact – perfect for setting a filter bed in the mashtun. I crossed my fingers, hoping this would boost my numbers a bit.

I noticed a difference during sparging and lautering – my wort ran clear faster, and I had no hint of a stuck sparge. I measured my pre-boil efficiency and came out over 75% – about a 20% boost just from changing one piece of equipment! Now, my brewhouse efficiency (true efficieny, into the fermentor) dropped quite a bit, but that was due to excess wort losses – I had trouble racking into the fermentor due to a clogged bazooka screen in the kettle (using whole leaf hops without a hop bag = dumb). At the end of the brew, I clocked in at 5 gallons of 1.060 OG wort when I was expecting 6 gallons of 1.061. The volume difference killed my brewhouse efficiency, but my recipe was calculated at an estimate of 70%, so it all balanced out in the end. I’m happy – my last brew came in 18 points under gravity, so this is a major improvement!

I will keep chasing my numbers and reporting back here – if I want to start formulating my own recipes and brewing to consistency, I need to dial in my system exactly. That means getting good sugar extraction from my mash, figuring oiut my evaporation rate, and determining exactly how much water/wort is lost to grain absorbtion and tun/kettle deadspace.

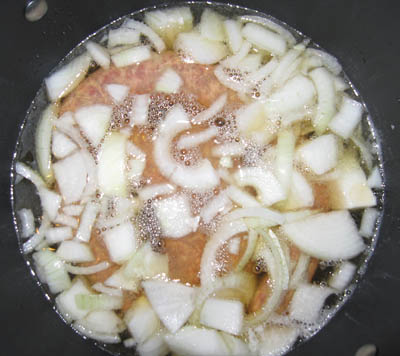
The Chocolate Porter is in the fermentor happily bubbling away (at 68°F, innoculated with the WL San Francisco Lager yeast I cultured from the last batch). I used my new Thomas Fawcett & Sons Halcyon pale malt as the base, and I am expecting nothing short of greatness from this batch! I am also proud to announce that during the mash, I grilled up some traditional Wisconsin-style bratwurst. Below is a picture of them simmering in beer and onions before moving to the grill.

Simmering bratwurst

Simmering bratwurst

The wort sample from the porter tasted dead on, the bratwurst were delicious on a toasted hero with raw onion and brown mustard, and it made slaving away over propane burners in the sweltering heat worth it. Nothing says summer like mixing a brewday with some grilling! Next week, I hope to knock out a new version of the California Common recipe while smoking some of my (semi)famous pulled pork. Speaking of smoking, I have plans to smoke some grain to create a cherry-smoked Hefeweizen and a classic Bamberg Rauchbier.

Tell me about your most recent brewday, your battles with efficiency, and your favorite sausages!

Coming soon, on lootcorp: my new chest freezer, why new beer site BrewAdvice.com needs our help, how to wire up a Ranco temperature controller and save some money, and lootcorp.com’s very first iPhone app!

Prost!

Jun 012010
 

Yeast starter

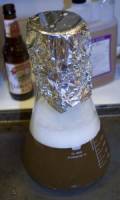
1.25L yeast starter

It all starts with a starter. Saturday night I cooked up a 1.25L starter to get my yeast ready for a Sunday brewday. Usually I make my starters a week or so in advance, letting them ferment out completely and then crash-cooling them, but this time I decided to try something different. I’ve read that making a starter the night before (or even morning of) brewday allows you to pitch the yeast at their most active. The only downside is you are adding the entire starter volume to your wort, but I figured 1.25L wouldn’t hurt the final product in any meaningful way. The starter preparation went down without a hitch, and I readied for brewing the next morning.

The beginning of the brewday went very slowly – I had to do a lot of cleaning and prep work since my brewery had sat dormant for so long. After a few hours of getting organized, washing equipment, and grinding grain, I was ready to mash in. I was using my recipe for Engine 97 Steam Beer, which calls for mashing at 154°F for one hour. I stirred and measured the mash temperature every 15 minutes.

Mashing in

Mashing in

I batch sparged and wound up with a little over 10 gallons of wort. I had measured my water in and out of the mash very carefully (using a scale to weigh it) since I am trying to lock down the loss numbers for my system. This brew lost appx. 1.5 gallons to grain absorption and another half gallon or so to tun deadspace. These numbers were a bit off from my assumptions, and this (along with poor efficiency) caused me to miss my OG by quite a bit. During the next brew, I will try and pin down my efficiency problems, although I have a suspicion that my Corona mill is to blame.

Starting to boil

Starting to boil

After the mash was complete, I transferred the wort to the kettle for boiling. Everything from here on in was pretty textbook – 90 minute boil, with hops additions at 60m, 15m, and flameout (all Northern Brewer pellets).

Northern Brewer hops

Northern Brewer hops

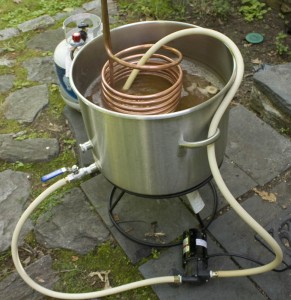
I set up for chilling by adding the IC to the boil with 20m remaining, along with a Whirfloc tablet. I also started recirculating wort through my March pump to sanitize it. The pump is great – it allows me to chill faster by moving the wort around the chiller in the kettle, and then lets me transfer to the fermentor with ease.

I chilled down to about 68°F (took about 20 minutes), racked to the primary, and added the yeast. Set it up in the fermentation fridge to ferment around 58°F. There was airlock activity within 24 hours, and the beer is now happily bubbling away.

Chilling the wort

Chilling the wort

I wound up with an OG of 1.042 (reading taken before adding the starter wort) – my target was 1.055 or so, so this is going to be a bit lighter beer than intended. I wound up with an efficiency of around 55%. I’ll need a few more brew sessions of data before I can really figure out where my losses are occuring, but I am tempted to try the same recipe with malt milled at the homebrew shop to see if I get a big jump. I have a love/hate relationship with my Corona mill, but I just don’t know if it is consistent enough to get a good crush. Seems I am either getting uncracked kernels or flour, and it is very hard to find that middle ground.

I will be using this batch’s yeast cake to brew another few batches of this beer – I have been told the yeast doesn’t reach its peak until the third batch or so. Hopefully I’ll be able to get my system dialed in and have a perfect batch of California Common by that third time around.

Jun 102008
 

Click here for this brew session’s recipe…

Sunday, the first of June, was a beautiful and sunny day in Fairfield County – perfect for brewing. I had been planning to make a batch of a Leinenkugle’s Sunset Wheat clone for some time, so I seized the opportunity and fired up the ol’ burners. Since this is the first brew session I am posting, I’ll go into more detail about my process than I would otherwise. If you have any questions, leave a comment and I’ll be happy to answer them!

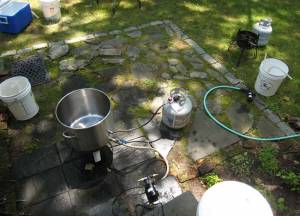
Brewday equipment

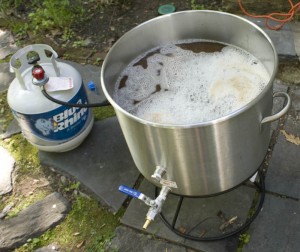
My brewday setup

Continue reading »